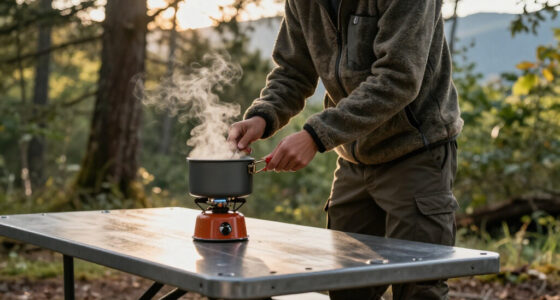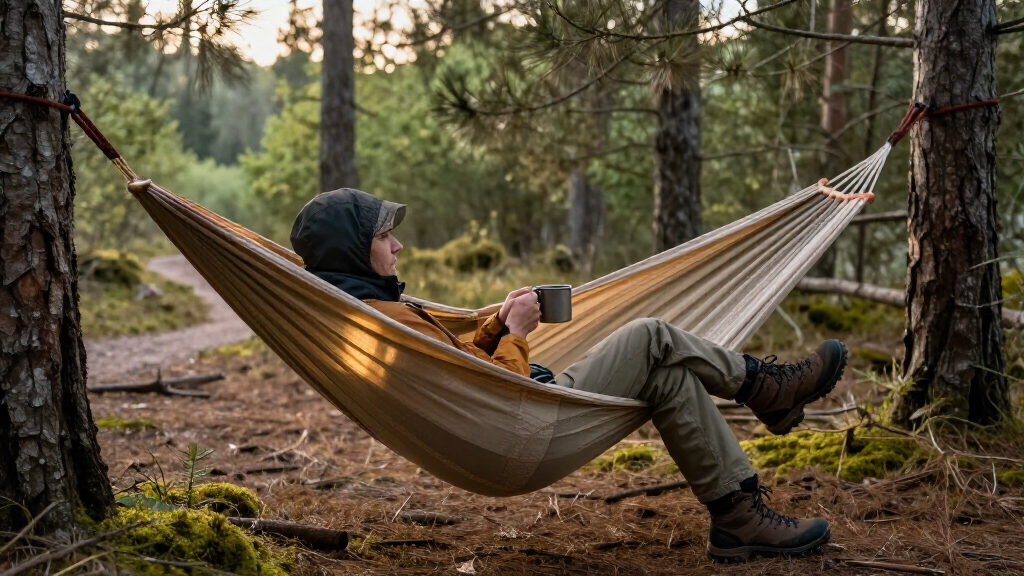

This guide shows beginner campers how to set up and safely use a portable camping hammock, then pack it away for transport. You will learn how to choose a suitable site, attach the hammock without harming trees, check the hang, and troubleshoot common setup problems. Allow about 15-30 minutes for your first setup; later setups usually take less time.

Get travel and outdoor gear delivered free — and shop member deals
- Fast, free delivery on millions of items
- Access to Prime Big Deal Days deals on October 6–7
- Prime Video, Amazon Music and more included

Wise Owl Outfitters Single Camping Hammock – Portable Lightweight Parachute Nylon (Black & Grey)
- ✔ Dimensions: 9 ft × 4.5 ft
- ✔ Weight: 16 oz
- ✔ Maximum load: 400 lbs
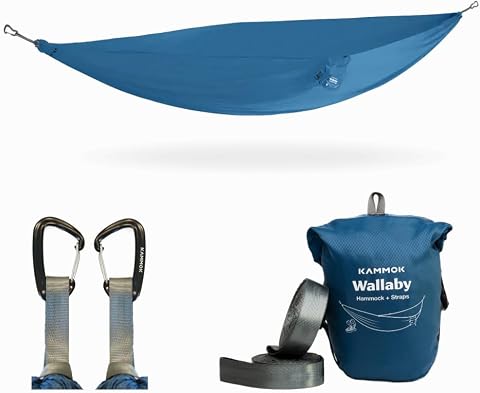
Kammok Wallaby Lightweight Hammock with Straps – Glacier Blue
- ✔ Length: 10 ft
- ✔ Width: 56 in
- ✔ Material: Diamond ripstop nylon

Lazy Daze Camping Hammock – Double Outdoor Hammock with Curved Spreader Bar
- ✔ Hammock dimensions: 78.7 in × 59 in
- ✔ Material: Cotton hammock with aluminum spreader bar
- ✔ Spreader bar: 33.4 in
Difficulty: Beginner | Time: 15-30 minutes
What You’ll Need
Tools & Materials:
- Portable camping hammock with its suspension system
- Two sturdy trees or approved hammock supports
- Tree straps at least 1 inch (2.5 cm) wide, unless the hammock has another tree-safe suspension system
- Optional rain tarp and bug net, compatible with the hammock
- Small light or headlamp for checking the site in low light
Knowledge:
- Basic ability to follow the hammock and suspension manufacturer’s instructions
- Awareness that tree condition, weather, and campsite rules affect safe setup
Check the hammock’s load limit and the suspension system’s instructions before use. The combined weight of the user, clothing, and gear must stay within the rated limit. Follow local rules about hammocks, tree attachment, and campsite use. Do not use a hammock over water, cliffs, roads, fires, or other hazards.
Wise Owl Outfitters Single Camping Hammock – Portable Lightweight Parachute Nylon (Black & Grey)
For campers who expect to carry their hammock in a pack, the Wise Owl’s stated 16-ounce weight gives it the clearest portability advantage in this lineup. Its 9-by-4.5-foot bed is sized for one, and quick-dry parachute nylon is a practical match for changing campsite conditions: it is breathable, weather-resistant, and machine washable. The built-in stuff sack keeps the hammock together for transport, while tree straps and carabiners mean we do not need to source the basic suspension pieces separately.Compared with the Kammok Wallaby, this is the more explicitly lightweight choice, but the Wallaby offers more length and width for stretching out. Compared with the Lazy Daze Double, Wise Owl gives up shared lounging and the spreader-bar shape in exchange for a far more trail-oriented package. Its 400-pound capacity is substantial for a single-person model, but capacity does not make it a two-person hammock: the listed design is for one occupant. We also do not have a packed-size measurement, so the 16-ounce figure is the strongest supplied indicator of carry convenience rather than proof of an exact pack volume.
Pros:
- Stated weight of 16 ounces suits weight-conscious packing.
- Includes tree straps, carabiners, and a built-in stuff sack.
- Quick-dry, breathable parachute nylon is suited to variable outdoor conditions.
- 400-pound maximum load and triple-stitched seams support durable solo use.
Cons:
- Designed for one person, not shared lounging.
- Its 9-by-4.5-foot bed is smaller than the Wallaby’s listed dimensions.
- No packed-size measurement is supplied, limiting precise pack-volume comparison.
Best for: Solo campers and backpackers who want a light, complete hammock kit with quick-dry fabric and straightforward setup.
Not ideal for: Two people sharing one hammock, or buyers who prioritize a wider, longer lounging surface over low carry weight.
Bottom line: We rank the Wise Owl first for portable solo camping because it combines the lineup’s clearest low-weight claim with an included, ready-to-set-up kit.
“We rank the Wise Owl first for portable solo camping because it combines the lineup’s clearest low-weight claim with an included, ready-to-set-up kit.”
Kammok Wallaby Lightweight Hammock with Straps – Glacier Blue
The Wallaby is the middle ground for buyers who do not want to choose between a basic compact hammock and a broad double lounger. At 10 feet long and 56 inches wide, it gives a solo camper more room to stretch than the Wise Owl’s 9-by-4.5-foot bed. Diamond ripstop nylon is intended to resist tears, and the included straps and carabiners support tool-free setup between suitable anchors. Its compact fold is described as backpack-friendly, though no exact weight or packed dimensions are provided.That missing weight detail matters when comparing it with the Wise Owl, whose 16-ounce figure gives backpackers a more concrete basis for planning. The Wallaby’s dimensions, however, make it the stronger option for campers who value lounging space and may move between a campsite, park, or patio. Unlike the Lazy Daze, it has no spreader bar or cotton-care concern in the listed construction; in return, it does not present the same explicit double-hammock positioning. We also lack a listed load capacity, so buyers who need a confirmed limit should favor one of the two models with a stated figure. The Glacier Blue color is a minor constraint, but the more meaningful limitation is the need for sturdy anchor points.
Pros:
- 10-foot length and 56-inch width provide generous room to stretch.
- Diamond ripstop nylon is designed to resist tears.
- Straps and carabiners enable tool-free setup.
- Compact design is described as suitable for a backpack or travel bag.
Cons:
- No maximum load or exact hammock weight is supplied.
- Requires sturdy trees or other compatible anchor points.
- Only Glacier Blue is specified in the supplied product information.
Best for: Campers who want a roomy solo hammock for a mix of campsites, parks, and day hikes without moving to a spreader-bar double.
Not ideal for: Buyers who need a verified weight capacity or precise packed weight before planning a backpacking load.
Bottom line: We recommend the Wallaby when extra lounging room matters more than a published ultralight weight or capacity figure.
“We recommend the Wallaby when extra lounging room matters more than a published ultralight weight or capacity figure.”
Lazy Daze Camping Hammock – Double Outdoor Hammock with Curved Spreader Bar
If our camping plan centers on relaxing together rather than cutting pack weight, the Lazy Daze is the specialist choice. Its 78.7-by-59-inch cotton bed is presented as a double, and the curved 33.4-inch aluminum spreader bar creates a more open, structured lounging shape than the fabric hammocks from Wise Owl and Kammok. The listed 450-pound capacity is the highest stated in this group. A drawstring carry bag and hanging kit with two straps and two carabiners are included, so the core setup hardware travels with the hammock.Those comforts bring practical compromises. The spreader bar and cotton construction make this less compelling for a backpacking load than the Wise Owl’s 16-ounce nylon design, and no hammock weight is provided for a direct comparison. Cotton also needs to be stored dry and protected from direct sun or heavy rain, unlike the Wise Owl’s specifically described quick-dry, weather-resistant fabric. Most importantly, the Lazy Daze needs trees 14–20 feet apart and a recommended hanging height of 5.5–6 feet. That requirement can rule it out at some campsites, even when a lighter hammock could fit. We would choose it for accessible campsites with suitable trees and shared lounging, not for compact solo travel.
Pros:
- Double design and 59-inch width suit shared lounging.
- 450-pound listed capacity is the highest stated in this comparison.
- Curved aluminum spreader bar provides a structured, open shape.
- Carry bag, two straps, and two carabiners are included.
Cons:
- Requires trees spaced 14–20 feet apart, limiting campsite compatibility.
- Cotton should be kept dry and protected from prolonged sun or heavy rain.
- No product weight is supplied for backpacking comparisons.
Best for: Couples or campsite loungers who want a wide, spreader-bar hammock and can confirm suitable tree spacing.
Not ideal for: Backpackers focused on minimizing carried weight, campers without trees 14–20 feet apart, or anyone seeking low-maintenance wet-weather storage.
Bottom line: We choose the Lazy Daze for roomy shared relaxation at accessible campsites, while its spacing and fabric-care demands keep it below the nylon solo options for portable travel.
“We choose the Lazy Daze for roomy shared relaxation at accessible campsites, while its spacing and fabric-care demands keep it below the nylon solo options for portable travel.”
As an Amazon Associate we earn from qualifying purchases.
Before You Start
Inspect the hammock, stitching, carabiners, suspension, and straps for damage. Do not use frayed webbing, torn fabric, bent hardware, or parts that do not lock or close as intended. Select a site with enough space between suitable supports and a clear, level landing area beneath the hammock. Check for dead branches overhead, sharp objects, ant nests, and signs of unstable ground. Avoid attaching straps to saplings, damaged trees, or trees prohibited by the land manager.
Set up in daylight when possible. A hammock hang can be too high or too tight even when the fabric appears secure, so plan to test it close to the ground before settling in.
Step-by-Step Instructions
Step 1: Choose a safe, permitted site
Find two sturdy, living trees or approved supports, with enough separation for the hammock and its suspension. Check both trunks and the area overhead. Look for dead or hanging branches, cracked limbs, loose rocks, sharp debris, and other hazards. Confirm that hammock use and tree straps are allowed at the campsite. Keep the setup away from fire rings, steep slopes, and paths where someone could walk into the suspension.
Tip: Do not choose a tree based on trunk size alone. Reject any support that appears damaged, loose, or unstable.
Check: You have two sound supports and a clear area beneath and around the planned hang.
Step 2: Lay out and inspect the gear
Unpack the hammock and lay out the fabric, straps, and hardware where you can inspect them. Check seams and attachment points for tears or loose stitching. Run your hands along the straps to find cuts, fraying, or worn sections. Confirm that buckles and carabiners match the manufacturer’s setup and function normally. Separate any rain tarp or bug net so you can identify its attachment points.
Tip: Never substitute ordinary cord, thin rope, or a damaged strap for the suspension supplied or approved for your hammock.
Check: All parts are present, undamaged, compatible, and within their rated use limits.
Step 3: Attach the tree straps
Wrap one tree strap around each trunk at a comfortable working height, following the strap manufacturer’s method. Keep the strap flat and untwisted, and connect it to itself as directed. Use wide tree straps to spread pressure over more bark; do not wrap narrow cord directly around a tree. Position the two attachment points so the hammock can hang with a gentle curve rather than being pulled tight like a line.
Tip: Keep straps clear of sharp bark edges or protruding branches that could cut or abrade the webbing. Do not hammer hardware into a tree.
Check: Both straps sit flat on the trunks, have no visible damage, and are secured according to their instructions.
Step 4: Connect the hammock and set a low hang
Attach each end of the hammock to its strap using the approved buckles, loops, or carabiners. Close or lock hardware as directed. Start with the hammock hanging low enough that you can sit into it with your feet near the ground. Leave a noticeable sag; a nearly straight, tight hammock can place greater force on its suspension and feel uncomfortable. Adjust the straps in small increments rather than raising one end sharply.
Tip: Do not attach carabiners to parts of the strap system that the manufacturer has not approved. Keep the connection aligned so hardware is not loaded sideways.
Check: The hammock is connected at both ends, the hardware is seated as intended, and the fabric forms a relaxed curve.
Step 5: Test the setup before getting in
Check that the straps have not slipped and that the hammock fabric is not twisted. Press down on the middle of the hammock with your hands, then sit down slowly while keeping your feet close to the ground. Pause and inspect the connections. If anything shifts, creaks unusually, loosens, or looks strained, step out and correct the setup before lying down. Once stable, ease yourself into the center rather than jumping or dropping into it.
Tip: Make your first test with no valuable items inside. Keep children and pets away while you adjust the suspension.
Check: The hammock supports a slow, controlled test without slipping, tearing, or visible stress at the attachments.
Step 6: Set up weather and insect protection
If rain is possible, hang a compatible tarp above the hammock and secure its lines so they are taut without pulling the hammock suspension out of position. Angle the tarp to shed water away from the sleeping area, and check that its edges provide useful coverage. If insects are a concern, fit the compatible bug net according to its instructions and close all openings. Keep tarp lines visible and outside walking paths.
Tip: A tarp does not make an unsafe site safe. Recheck overhead branches and avoid camping beneath limbs that may fall in wind or rain.
Check: The tarp covers the hammock as intended, net openings close fully, and all lines are secure and easy to see.
Step 7: Get in, adjust, and use the hammock carefully
Stand beside the hammock, hold the fabric for balance, and sit in the middle. Then turn your body and lower your shoulders and legs into the fabric. Shift gradually until you are comfortable; avoid bouncing, standing on the fabric, or putting full weight on one edge. Keep sharp objects, food, and loose equipment from pressing against or snagging the hammock.
Tip: Follow the hammock maker’s guidance for sleeping position and weight limits. A portable hammock may need an insulating pad or other compatible sleep gear in cool weather.
Check: You can lie down without the hammock sliding, the suspension shifting, or the fabric rubbing against a sharp object.
Step 8: Take down and pack the hammock
Remove your belongings and step out slowly. Take down the tarp and bug net first if fitted, then disconnect the hammock and remove the straps without dragging them across the ground. Inspect the equipment again for fresh wear. Shake off dirt and pack the fabric and suspension according to the manufacturer’s instructions. If wet, dry the gear fully before long-term storage.
Tip: Leave the site as you found it. Remove every strap and line, and do not leave cord around trees or across the campsite.
Check: The site is clear of gear and lines, and the packed hammock is clean enough for storage with no new damage.
Common Mistakes to Avoid
- Hanging the hammock too tight. — Leave a gentle curve in the fabric and adjust the supports in small increments. Test the hang before lying down.
- Using narrow cord or unsuitable straps directly on a tree. — Use wide, tree-safe straps or a suspension system approved for the hammock, and follow local campsite rules.
- Skipping the support and overhead inspection. — Check trunks, limbs, ground, and the landing area before attaching any gear. Move the setup if a hazard is present.
- Jumping or dropping into the hammock. — Sit down slowly with your feet near the ground, inspect the connections, then ease into the center.
Troubleshooting
Problem: The hammock sags so low that it touches the ground.
Solution: Step out, check that the trees are far enough apart, then shorten or reposition the suspension within its instructions. Keep the gentle curve and retest close to the ground.
Problem: The hammock feels tight, unstable, or uncomfortable.
Solution: Get out and add more sag by loosening the suspension slightly. Check that the hammock is centered, untwisted, and attached at compatible points.
Problem: A strap slides down the tree or hardware shifts.
Solution: Stop using the setup and unload the hammock. Reposition the strap using the maker’s method, check for slipping or damage, and retest slowly. If it continues to move, choose different supports or gear.
Problem: The tarp does not keep rain off the hammock.
Solution: Adjust the tarp’s position and angle, secure its lines, and check that it extends over the hammock. If conditions exceed the shelter’s design or wind makes the site unsafe, move to suitable shelter.
What Success Looks Like
The hammock is attached to sound, permitted supports with tree-safe suspension; the straps and hardware show no damage or movement; and the fabric hangs with a comfortable curve. A slow test sit causes no slipping or unusual strain. Any tarp or bug net is properly secured, and after packing, no gear or lines remain at the site.
Next Steps
After each trip, inspect seams, straps, and hardware, then clean and dry the hammock as its care label directs. Store it away from dampness, heat, and sharp objects. Replace damaged parts rather than improvising repairs to load-bearing suspension. Before your next trip, check campsite rules and forecast conditions, and practice setting up the hammock at a low height if you have changed equipment.
Frequently Asked Questions
How high should I hang a portable camping hammock?
Start low enough that you can sit in the hammock with your feet near the ground. Adjust for a gentle curve and stability rather than aiming for a fixed height; the correct position depends on tree spacing and the hammock’s suspension.
Can I hang a hammock from any two trees?
No. Use sturdy, living trees that are permitted for hammock use and have no visible damage or hazardous overhead limbs. Avoid saplings, unstable supports, and locations above hazards.
Do I need a tarp or bug net?
Use a tarp when rain or strong sun requires overhead protection, and a bug net when insects are a concern. Check compatibility and fit each accessory according to its maker’s directions.
Can I leave my hammock set up overnight?
Only if campsite rules allow it and the site and weather remain suitable. Recheck the supports, suspension, and overhead area before sleeping, and take the hammock down when required by the site or when conditions become unsafe.
What should I do if I find damage before setting up?
Do not use damaged fabric, stitching, straps, or hardware for a loaded hang. Replace the part with a compatible, manufacturer-approved item before using the hammock.
Halloween Picks
halloween
As an affiliate, we earn on qualifying purchases.